Python binding for Kuesa Load, render and manipulate glTF models in your python application using Qt 3D
KUESA™ is a Qt module designed to load, render and manipulate glTF 2.0 models in applications using Qt 3D.
Kuesa provides a C++ and a QML API which makes it easy to do things like triggering animations contained in the glTF files, finding camera details defined by the designer, etc.
It is a great tool so that designers and developers can share glTF based 3D assets.
With the upcoming release of Kuesa 1.1, we are introducing a python binding for Kuesa. This provides a simple yet powerful way for programmers to integrate glTF content in their python applications with just a few lines of code.
Building Kuesa’s Python binding
The first step is, of course, to build and install Kuesa itself. Instruction are available here, it’s a simple process. Kuesa is a Qt module so it typically installs inside Qt’s standard folders.
Next step is to install Python for Qt, AKA PySide. Note that you must install it for the same version of Qt that you compiled Kuesa with.
If you’ve built your own version of Qt, fear not. Building the python binding for that is fairly easy and quick.
In all cases, we would recommend you use a python virtual environment. This will let you install several versions of the Qt bindings.
Once you’ve installed Python for Qt, you’re ready to build the Kuesa binding.
Building bindings for C++ libraries is a relatively simple process which uses several things:
- a header file which includes all the C++ headers for the files you want to build bindings for
- an xml file which lists all the classes and provides helper information for the binding generator. This contains details about enums, can help hide C++ methods or properties, etc
- a binding generator, Shiboken which parses the C++ headers and generates C++ code that implements the binding
The code for the binding, inside Kuesa’s src folder, contains a CMake project file which takes care of all the details.
So assuming the python virtual env is active and the right version of Qt is in the path, building the binding should be as easy as:
cd .../src/python
mkdir build
cd build
cmake ..
make
make installNote: the version of Python for Qt which ships with the 5.12 series is incomplete in it’s coverage of Qt 3D. In particular, some useful classes were missed in the animation module, like QClock which is useful to control the speed and the direction of the animation. We have submitted a patch for PySide which fixes this and it was merged in 5.13.
Your first Kuesa application with Python
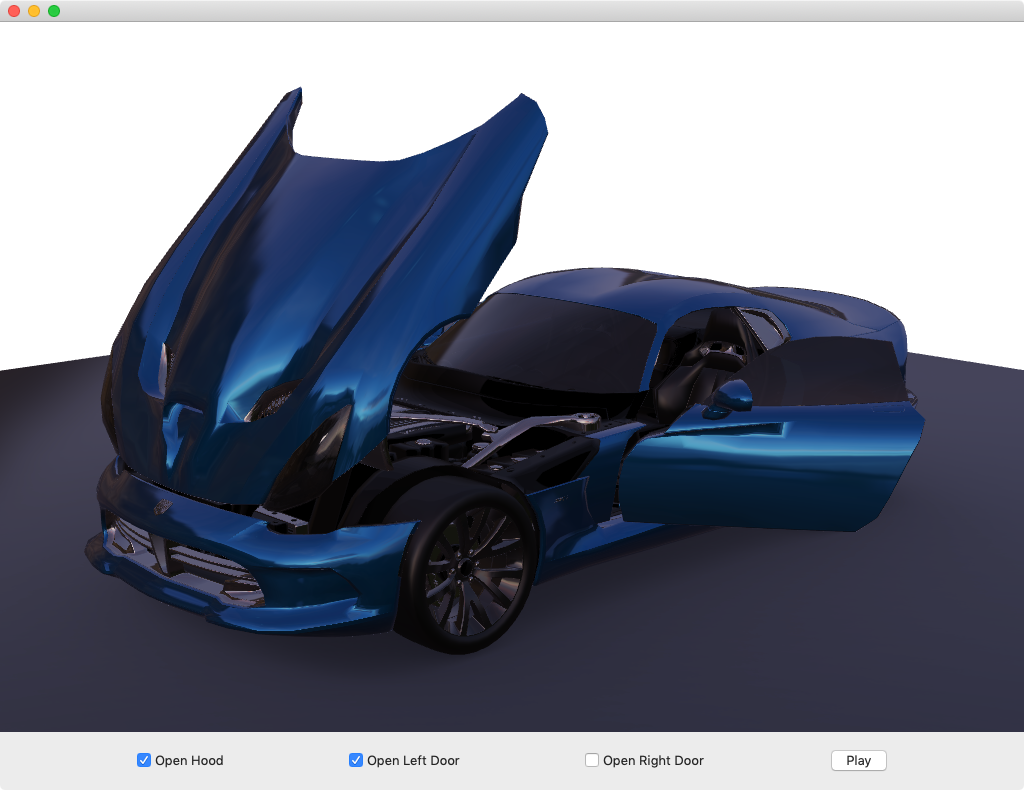
Kuesa ships with a simple python application that demonstrates the use of the binding.

The application starts by importing the various required modules:
from PySide2.QtCore import(Property, QObject, QPropertyAnimation, Signal, Slot)
from PySide2.QtGui import (QGuiApplication, QMatrix4x4, QQuaternion, QVector3D, QWindow)
from PySide2.QtWidgets import (QWidget, QVBoxLayout, QHBoxLayout, QCheckBox, QPushButton, QApplication)
from PySide2.Qt3DCore import (Qt3DCore)
from PySide2.Qt3DRender import (Qt3DRender)
from PySide2.Qt3DExtras import (Qt3DExtras)
from PySide2.Qt3DAnimation import (Qt3DAnimation)
from Kuesa import (Kuesa)
The scene graph will need a SceneEntity and a GLTF2Import node to load the glTF content.
self.rootEntity = Kuesa.SceneEntity()
self.rootEntity.loadingDone.connect(self.onLoadingDone)
self.gltfImporter = Kuesa.GLTF2Importer(self.rootEntity)
self.gltfImporter.setSceneEntity(self.rootEntity)
self.gltfImporter.setSource("file://"+ wd +"/../assets/models/car/DodgeViper-draco.gltf")
It must also use the frame graph provided by Kuesa. This is needed for the custom materials that Kuesa uses for PBR rendering. It also provides performance improvements such as early z filling, and additional post-processing effects such as blurring or depth of field.
self.fg = Kuesa.ForwardRenderer()
self.fg.setCamera(self.camera())
self.fg.setClearColor("white")
self.setActiveFrameGraph(self.fg)Note: in this case, the base class is an instance of Qt3DWindow from Qt 3D’s extras module.
When loading is completed, the content of the glTF file can be accessed using the various collections that are available on the SceneEntity class. For example, you can access the animations created by the designer and baked into the glTF file. These can they be controlled from python!
def onLoadingDone(self):
    self.hoodClock = Qt3DAnimation.QClock(self.rootEntity)
    self.hoodAnimation = Kuesa.AnimationPlayer(self.rootEntity)
    self.hoodAnimation.setClock(self.hoodClock)
    self.hoodAnimation.setSceneEntity(self.rootEntity)
    self.hoodAnimation.setClip("HoodAction")
Referencing glTF content is done using the names assigned by the designer.
From there on, animations can be started and stopped by accessing the animation player object. Speed and direction can be changed using the clock created above.
Finally, the application embeds the Qt3DWindow inside a widget based UI (using a window container widget) and creates a simple UI to control the animations.
Download KUESA™ here.